Thursday, May 29, 2014

Giving nail wraps not made out of nail polish another try...

Hi, everyone!

I've been spending the past couple of days putting together this bit of a long post I have for you today, but it's actually quite informational. I will be going more in depth about my thoughts about nail wraps, including what I used to think about some of them, and what I do now. I used to think that the only kind of nail wraps that worked on my curved nail beds were the ones made out of nail polish. Those are indeed the best for me, as I've never had a single issue with them, but it turns out I actually can use other nail wraps...with a bit more patience and willingness; and as long as they're thin and stretchable. 

You see, when your nail beds are super curved like mine, what usually happens when you try to apply them is that they don't stay flat on your nails. I don't have enough pics to depict this because I hate how it looks, but imagine wrinkles on the tips of your nails when you're expecting to have a flawless looking mani after spending quite a bit of time applying these nail wraps... Annoying! I'm not at all saying that nail wraps not made from nail polish are faulty, they just can be a bit tricky to apply on nails like mine. Like I've said in posts before, if you have flatter nail beds, you can wear any kind of nail wrap/nail sticker you want; if you apply whatever type you use correctly, then you won't have any issues. If you're like me, I've had a hard and disappointing time with non-polish wraps every time, until last night when I gave my NCLA nail wraps another go. I've always loved the designs of their nail wraps, but not so much what they're made out of. I've even had what seemed to be a great application right before I went to bed, then woke up to hideous wrinkles the next day (Nail wraps do not need to "dry" so the fact that I usually apply them at night before bed time doesn't matter)! NCLA, like most nail wrap companies recommend using top coat over the wraps after you've applied them. I tried using regular drying top coat, and even gel top coat, and both times ended up with disappointment. Because NCLA's designs are amazing, and that I was in between manis, I randomly thought up the idea to go back to my stash of left over wraps and give them another try. I thought, what could it hurt? 

I first applied a base coat, as I usually do. When I chose the nail wraps to apply, I chose sizes that are slightly smaller than my nail, also a usual for me. I pressed and held down the wrap right above the cuticle with my index or thumb finger of the same hand (I used the index while applying the wrap on my thumb nail, and my thumb for my ring and middle... Maybe I'm able to do this because my fingers are longer???) while stretching it upward and along the sides with my other hand, smoothing it out as I went along. I wish I had someone take pictures of me doing this, but I did it very late last night. Another thing I did differently is the top coat. I usually liked to use regular drying top coat for all of my nail wrap manis for shine purposes, but knowing that quick dry top coats usually take care of most imperfections like smudges and bubbles in nail polish, I thought it would possibly help here too. It turns out that my go-to quick dry top coat , INM's "Out The Door" top coat came in handy, and I'm quite happy with how this mani came out. Surprise, surprise!  Check out the pics below. 


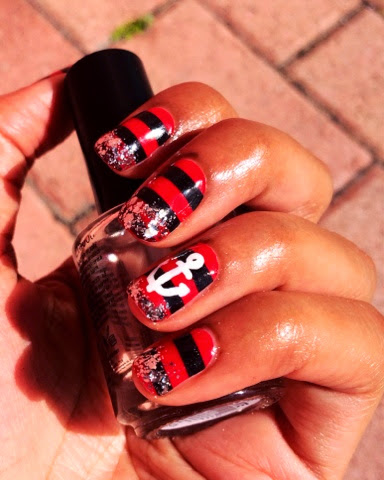
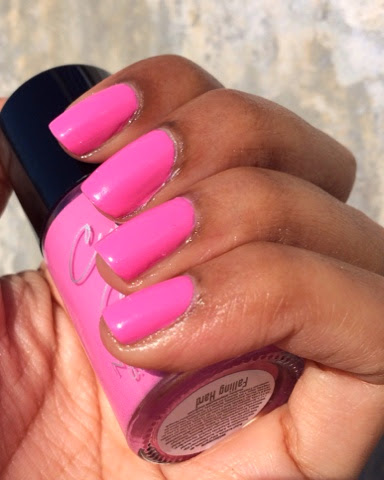
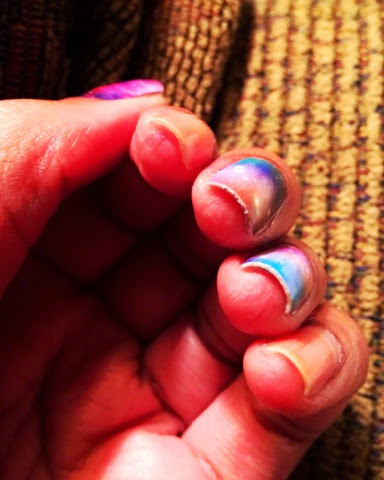
A shot of how curved my nail beds are. This is right after I applied the nail wraps, and before I applied nail polish on my index and pinky nails. Here, I was happy with how the wraps looked, but the real test was whether or not they'd still be this flat the next day! 


And what some of my nail buddies' nail beds look like. From top left, my friend Tam whose nail beds are similar to mine. My friend Jess from LuvMyLacquer took a pic of her little boy's nail beds that are more on the flat side. My friend Shea from OMG Wait What Polish Is That also has flatter nail beds. She can rock Jamberry nail wraps very well! ;) 


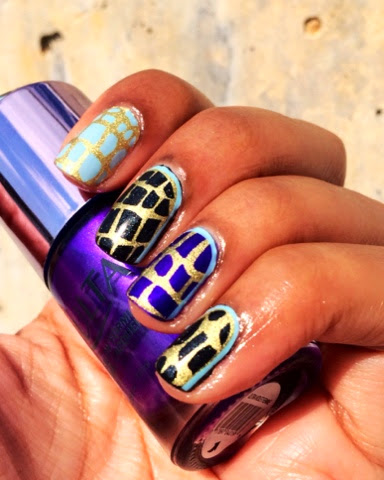
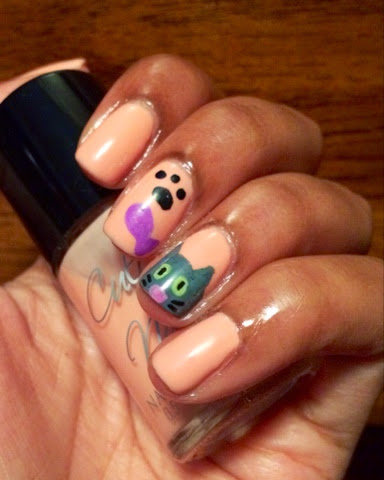
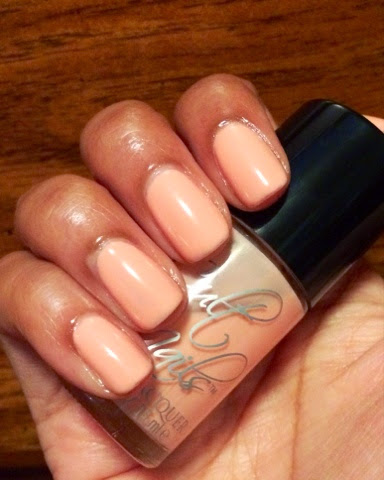
After my full mani is completed. I Used two coats of Illamasqua "Poke" with NCLA's "Stephanie's Galaxy" nail wraps followed by INM "Out The Door" top coat. Indoor lighting with flash.


 In sunlight the next day...


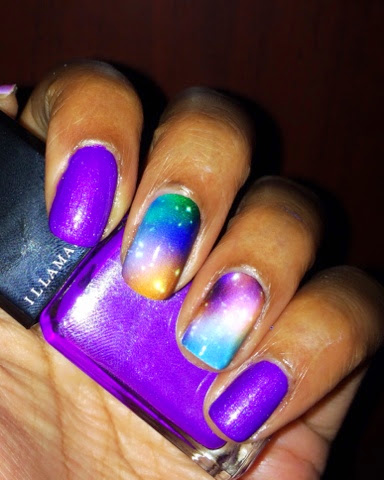
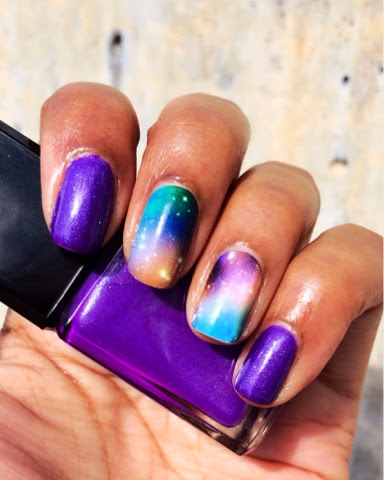
Nail wraps are still smooth, no wrinkles in sight! Yay!


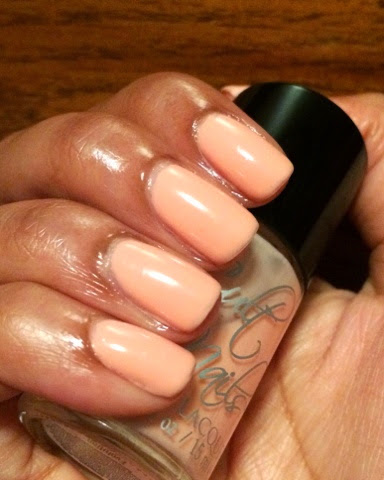
Here's a picture of what wrinkle-age looks like from a sample nail wrap (accent nail) I tried from Jamberry... :( This is what would happen to me with my NCLA wraps when I first started using them. 


Well, I'm glad to say that the left over wraps I have from NCLA can be put to good use; I even used a couple for my current pedi as well! It looks like my OTD top coat not only practically smoothed out everything, but it also seems to have helped the nail wraps "wrap" around my nails better. I also love the base coat that I use from Milani, that has a bit of a pinkish tint to it. I have always felt that base coats with a hint of color in it helps nail polish adhere to nails better, so maybe this was a help too. I wouldn't consider myself a nail wrap guru, but I can tell you what I know from my experience. I'm glad I figured out a way to get my NCLA wraps to work this time, and I'm looking forward to trying the wraps I have ordered that are on their way to me right now... this time clear ones! 

In all, I would recommend any thin, pliable, stretchy nail wrap for ladies (or guys) who have curved nail beds like mine. Nail polish ones are probably the easiest to use on curved nails, but as you can see from this post, other ones are possible too.  Thicker ones like the ones from Jamberry or any other wrap that's more like a sticker are a much better fit for flatter nail beds for sure. 

* As of this publishing, I wore the NCLA wraps for three days, which is way longer than what I could have ever worn them previously. If I didn't change my nails for my next blog post, I could have pulled them off for a bit longer! :)

So, what do you think? Turns out I just needed a bit more patience and a different top coat! Has any one else out there experienced the same frustrations as I have? I really hope that this post was helpful! I'd love to hear any feedback from you, if you have some! Thanks for reading, and I'll see ya next time.


Tiff 

Friday, May 23, 2014

Scratch Nail Wraps in "Reptilian"

Hello, everyone!

It's Friday!

I hope you had a great week. I have a really nice look on the blog today, featuring some more nail wraps from Scratch (my favorite nail wraps company) and their collaboration with nail artist Chelsea King. The wraps in "Reptilian" design utilize the clear wraps idea that Scratch is known for, so all of the spaces that you see in the "scales" are actually clear (with the exception of the wrap on my index finger...that one is printed blue). I used two polishes from Ulta to wear underneath the clear wraps. I hope you like how it came out!


I did this mani very late at night, right before I went to bed, so this is definitely not my best application. I was so tired, and in a hurry to get to sleep! Lol. The Ulta polishes are some of the ones I picked up a while back when they were on sale for just $2 each. The purple accent nail is "Ultra Violet Femme", and the black shimmery one is called "Little Black Dress". 

As you all know, I subscribe to the Scratch monthly mani box, which is part of the reason I feature them on my blog often. I just really love their unique designs, and I'm already excited for what next month's box has in store (Shark nail wraps perfect for "Shark Week"!). 

So, what do you think about this look? I think it's perfect for a fun summer night out, or any concerts you may have coming up. Nails are always an important final touch to whatever outfit you'll be wearing! See ya next time. 


Tiff 

Tuesday, May 20, 2014

Sally Hansen Salon Effects in "Stripe-Tease" with nail art

Hi, everyone!

I hope your week is off to a great start. Today I have a really quick nail art post to show you, featuring some Sally Hansen nail polish strips that I picked up at CVS a while ago. I stopped into a CVS store one day and saw that there were quite a few Sally Hansen products on clearance, so I snagged a handful of Salon Effects (my favorite product of theirs). Among my mini haul were these super cute red and black striped polish strips in "Stripe-Tease" that I thought would be fun to use. After I applied them the other day, I thought it would be a good idea to jazz them up a bit, so I added some glitter to the tips of each nail, and drew a little anchor with a white nail art pen (also from Sally Hansen). The red and black stripes made me think nautical, so I thought an anchor would add the perfect touch! Take a look at the pics below to see how it all turned out! :) 


The glitter that I used is from a nail polish set I found from The New Black, and there are quite a few TJ Maxx stores that have them on clearance (normally anywhere from $15-$25 regular priced). I would check them out if you have any TJ Maxx stores near you, and if you've been wanting to try The New Black polishes. As for the Salon Effects, "Stripe-Tease" is one of Sally Hansen's older designs, so you may not find these exact ones these days. They have many current designs to choose from, and you can find them at any place that sells Sally Hansen products. If you're fairly good at nail art, you can easily pull off a similar look with nail polish and striping tools; like many others out there.

So, what do you think? I'm glad I decided to add some more details to this mani. I think it came out quite good :) See ya next time!

Tiff 

Friday, May 16, 2014

China Glaze "Sand Dolla Make You Holla"

Hello, hello! 

The other day, before heading out of town, I quickly ran into a Sally's beauty supply store to get a cuticle trimmer. I walked in, found what I was looking for, then thought about taking a quick look at the clearance section. This Sally's store happened to have quite a few of the China Glaze "Sea Goddess" collection that I had been thinking about for quite a while. I grabbed three, walked up to the register to pay for my goodies, and the Sally's employee was nice enough to give me the buy 1 get 2 free deal on the China Glazes; even though they were on cleareance! I guess I walked in at the perfect time, because I didn't even know this deal was going on; nor did I know that promotions apply to clearance items as well. Three nail polishes for just about four dollars? ...I say yes! Lol... Anyways here's one of the ones I grabbed, and it's a super cute textured polish (all of the polishes in this collection are textured) called "Sand Dolla Make You Holla". Such a cute name! 


I really like polishes like this one, that have milky bases with multi-colored glitters. These combos remind me of frosting with sprinkles! Yummy :) 

Formula-wise, "Sand Dolla" was a bit tricky, but not so much that I wouldn't use it again. It was kind of thick, so I gave the bottle a good shake every once in a while. I applied three thin coats, and gave each coat a good two minutes or so to dry. Despite its thickness and having to apply three coats, I would say that it came out fairly leveled on my nails, and not like thick blobs (which tends to happen to me when I put on more than three coats of polish). I am looking forward to using the other two polishes I picked up from this collection, and I don't see the textured trend going out of style any time soon. They look great in the bottle, so I can't wait to see how they look on the nail! Have you picked up any polishes from the "Sea Goddess" collection? If so, what do you think? See ya next time, and have a great weekend! :)


Tiff 

Tuesday, May 13, 2014

Scratch Nail Wraps in "Check It Out" with Zoya Kelly

Hi, there!

Today I have a really cool post featuring a set of nail wraps from the latest Monthly Mani Box from Scratch, in collaboration with nail artist Chelsea King

As soon as the company announced that they would be working with Chelsea, I knew I had to sign up for the box, even before I saw any sneak peeks of their designs. Chelsea is one of the most amazing nail artists out there, and her work and her number of followers says it all! From this MMB, I decided to go with the set of clear wraps called "Check It Out", and layer them over a really nice grey (Zoya Kelly, and oldie but goodie) so the intricate tribal-inspired design could really pop. Check out the pics below! 


I made a really quick decision in choosing which nail polish to use, but I think the blue-ish tone in the polish balances out the blue in the nail wraps very well. I guess I just know which colors go well together! ;) Another thing I love about subscribing to Scratch's MMB besides the unique designs they offer is that they always include a really neat extra in every box (on a couple of occasions it's been an edible treat!). Check out the super cute crown midi ring I got with this Chelsea King box :) 

If you're going to give the whole idea of layering clear nail wraps over nail polish, it's very important to let the nail polish dry completely before applying the wraps. I've seen all sorts of manis that came out a bit messy (trying to say this as nice as possible! Lol!) , and I'm betting it's because there was some rushing of the application process. Take your time (I like to do my nails while watching tv), and you'll be amazed at what a difference it will make. If you're not the best at applying nail wraps, make sure you are choosing the right size nail wrap for each nail. That is definitely one of the most important initial steps. Check out the pictorial I did for more information about how I apply my nail wraps, and all of the tools I think you need to make the process go smoother. 

So, what do you think about this look? I think I'm going to keep this on for a few days! :) See ya next time!


Tiff 

Friday, May 9, 2014

Cult Nails "Falling Hard" with nail art

Hi, everyone! Happy Friday!

Today I have another post featuring a nail polish from Cult Nail's latest collection "It's a New Day". If you read my previous post, I had said that I was going to use the yellow polish next, but I couldn't think of a look using that one that would have been interesting enough for me (not that that polish doesn't look great on its own). I basically ended up going with "Falling Hard", and did some more nail art by drawing some houndstooth patterns with my Sally Hansen nail art pens. Take a look at the pics below to see how my nails turned out.


And the polish on its own, in two coats with top coat...


If you preordered the collection like I did, you know that your package included a stamping plate with some really cute designs. I have not managed to successfully transfer a stamping image on to my nails yet, so I just decided to go with some hand-drawn nail art again. That was way easier for me, and much less frustrating than attempting another stamping look. Oh, well. I like how this look came out anyways, and this was just my first time drawing houndstooth on my nails... Not bad! 

I highly recommend Sally Hansen's nail art pens. If you can draw fairly well, then you can easily create any kind of nail art look you want with them. They retail for about $6 each, and can be found at Ulta, CVS, and anywhere Sally Hansen products are sold. 

To grab "Falling Hard" and any other Cult Nails polish that interests you, order them from their official website here. There's a 20% off sale going on now, and the presale for their May colors has also started ($24 for the set)... There's lots of trouble to get into! ;) Have fun! 


Tiff  

Sunday, May 4, 2014

Cult Nails "Evolution"

Hello!

Today I have a fun little post with some cute and simple nail art. 

A couple of weeks ago, I participated in my first  pre-order of a Cult Nails collection, which is their latest called  "It's A New Day". Since I missed out on the last one completely (still kicking myself for that...) , I told myself that when ever they come out with a collection with every color catching my interest, I will go for it! Lesson learned! With that said, here's what "Evolution" looks like on me, with some cute cat nail art (I'm a big cat lover!)! I hope you like it! 


Most people that have used this color have been able to get it on perfectly with three coats. I used three, then a super thin fourth coat, since I'm overly obsessive. The kitty nail art was done using nail art pens from Sally Hansen. I love these because I feel they are much easier for me than striper polishes. There's something about the pens that let me feel more comfortable with adding more details than the long, thin brushes that come with nail art polishes. This was only my second time using these nail art pens, but because of my visual art background, I can see my self getting better and more detailed with them. I'm excited to get more colors and do more nail art manually! 

So... What do you think? "Evolution" is a big hit in the nail community, and hopefully you can see why. I cannot think of any other nail polish like it out there, and the soft, squishy finish is so nice to look at on the nail. Did you pre-order this collection too? If not, hurry, because they are available for individual sale online now; and these will sell out for sure. Also, now makes the perfect time to put in a Cult Nails order, as they are running a 20% off sale for the entire month of May! I can't figure out which of these "It's a New Day" polishes to use next, but I'm thinking I might go with "New Day", the bright yummy yellow...See ya next time!

- Tiff